This section covers setting up your email account on the iPhone ( Version 2.X ).
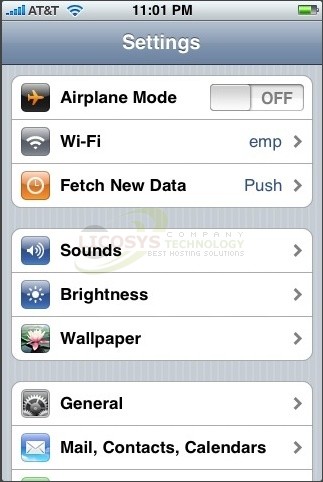
Step 1:Â From the Dashboard click "Settings".

Step 2:Â Under "Settings" select "Mail Contacts Calendars".

Step 3:Â Select "Add Account".

Step 4:Â Select "Other" as the type of account.

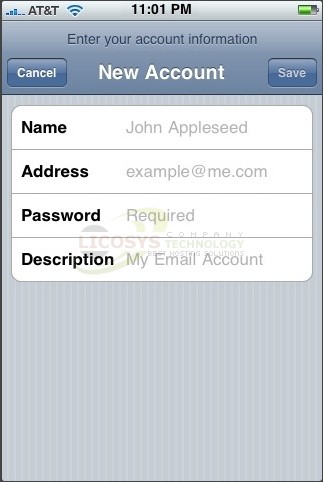
Step 5:Â Enter the requested information:
- Name:Â Enter the name of the mail user.
- Address:Â Enter your full email address.
- Password:Â Enter your email account password.
- Description:Â Enter a description of the mail user.

Step 6:Â Click "Next".
Step 7:Â Click "POP" and enter the "Incoming Mail Server" information:
- Host Name:Â Enter "mail.yourdomain.com".
Please make sure to replace "yourdomain.com" with your actual domain name. - User Name:Â Enter your full email address.
- Password:Â Enter your email account password.

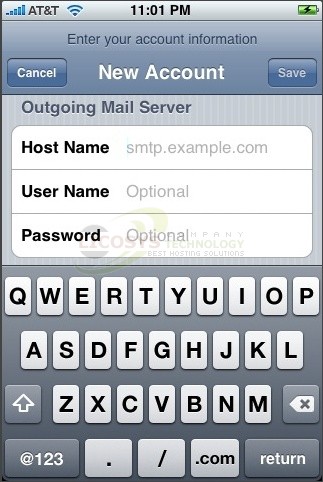
Step 8:Â Scroll down and enter the "Outgoing Mail Server" information:
- Host Name:Â Enter "mail.yourdomain.com".
Please make sure to replace "yourdomain.com" with your actual domain name. - User Name:Â Enter your full email address.
- Password:Â Enter your email account password.

Step 9:Â Click "Save".
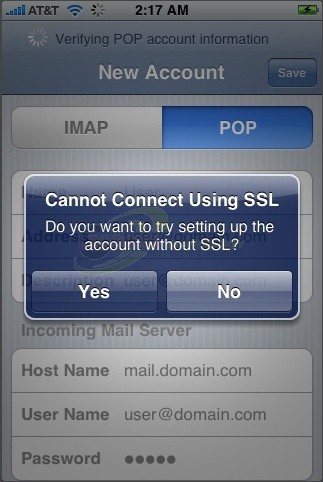
If you see a message that says "Cannot Connect Using SSL" click "Yes" when asked to setup the account without SSL.

The Advanced settings for the account will be displayed and do not need to be changed.

Congratulations! You have successfully setup your email account on the iPhone version 2.x.

